Webex is the new video conferencing, messaging and team management tool that everyone’s talking about. Ok, it’s technically about 25 years old, so not that new, but it’s really been pushed into the limelight during this time of increased remote working.
We’ve already talked a bit about Webex in our Zoom vs. Webex comparison, but here we show you quickly how to share your screen on Webex, letting your colleagues see what you’re doing on your screen in real time, watch videos with you, and so on.
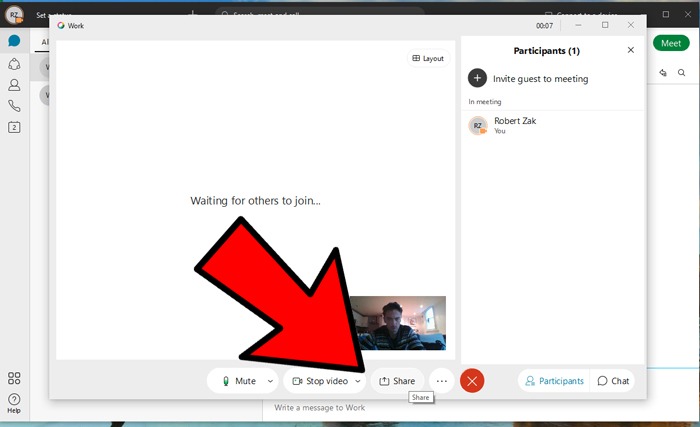
First, open Webex and start a meeting with the participants you want to share your screen with. Once the meeting is open and all participants are present, click the Share button at the bottom of the meeting window.

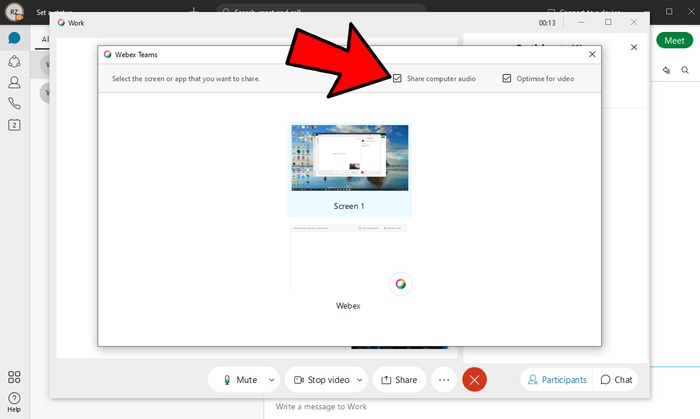
You’ll now have an option to share your entire screen, a specific window that you have open on your desktop (it’s best to open this window and have it ready before opening Webex), or your Webex window.
For this demonstration, we are sharing our screen. If you want to play videos on your shared screen with the participants, check the “Optimize for video” box and also the “Share computer audio” box if you want to share sound from your PC.

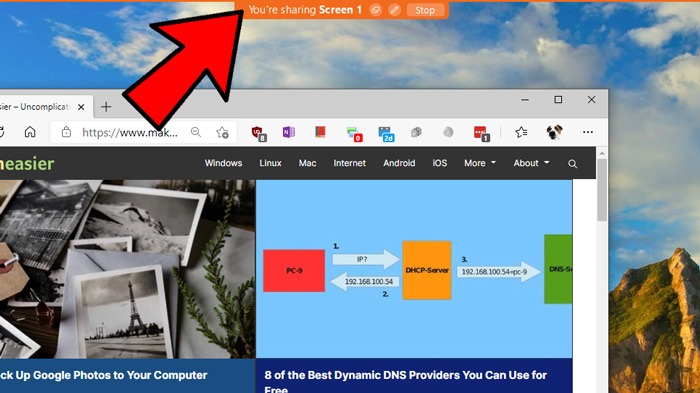
When you’re ready, double-click “Screen 1” (or whichever screen you want to share). Once screen-sharing is active, you’ll see an orange bar at the top of your screen letting you know that you’re now sharing your screen.

Click Stop at any point to stop sharing your screen or click the icon with the two squares to change to a different screen you’d like to share with the participants.
You can see that sharing your screen in Webex is very simple, and it just may help you during your next meeting. If you conduct your meetings on Zoom instead, read on to learn how to lead a Zoom meeting and make it productive, as well as how to attend a Zoom meeting and be productive.
