For years iPad buyers have longed for a true laptop replacement. When it first launched, the iPad was nothing like a computer. It lacked even the most basic of multitasking functions. Years later, the iPad has grown exponentially as Apple has introduced plenty of rich features that make the iPad far more powerful for productivity. Let’s take a look at the ways you can multitask on the iPad today.
How to Enable Multitask Features
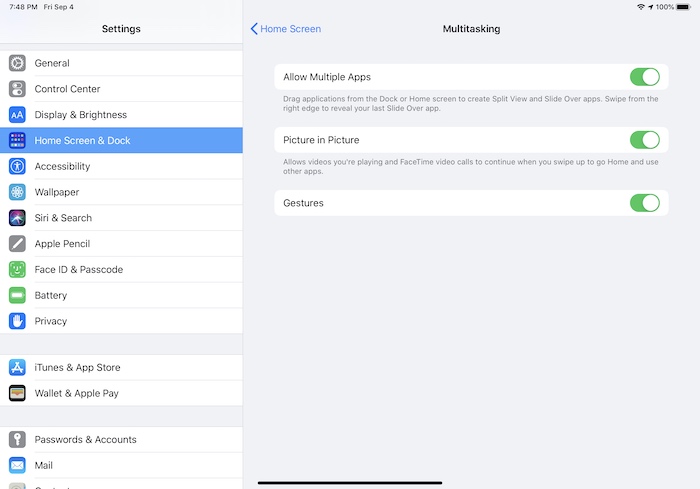
Before you can get started learning about multitasking on the iPad, you need to enable multitasking. To turn everything on, head to “Settings -> Home Screen & Dock -> Multitasking.” You now have a few sets of options, including allowing multiple apps, picture-in-picture as well as gestures, if they are not already enabled.
How to Multitask in a Video Call
Apple has pretty strict limitations when it comes to the kind of video calls you can make while multitasking. First, you’ll need to enable ‘Picture in Picture’ in Multitasking Settings (as shown under the previous heading), but even when you do that you’ll find yourself quite limited.

The only video call app you’ll be able to multitask with is FaceTime, with iOS blocking PiP in popular video-call apps like Skype, Zoom and Facebook Messenger. Ostensibly, this is for security reasons, but knowing Apple, it could also be because they want to have their users stick with Apple apps.
So if you want to do video calls in Picture-in-Picture or split-screen in iOS, the only way is via Facetime. We already showed you how to enable Picture-in-Picture, but for Split View, read on below.
How to Use Split View
Slide Over works great if you just want limited info. However, to get serious with multitasking, you want to get started with Split View. This feature enables two apps to work side by side for “true” iPad multitasking. This is the ideal way if you want to take notes on one side of the screen and browse on another. You can use Google Docs on one side and research a writing topic on the other side with Safari. To open Split View:
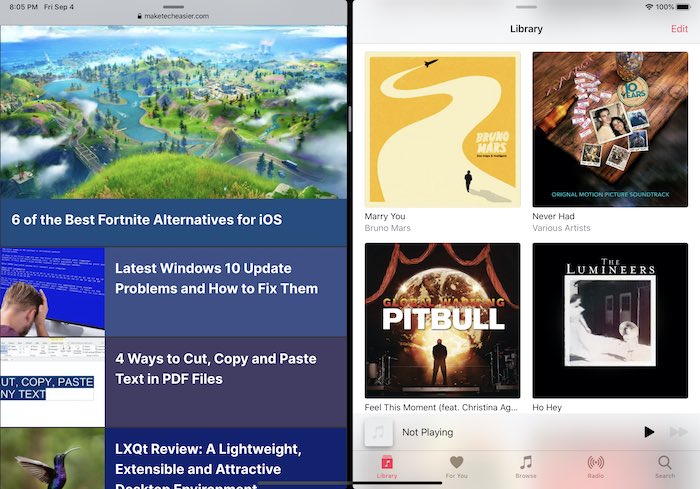
1. Open an app so it goes into full-screen mode. Swipe up from the bottom of the screen to bring up the dock.
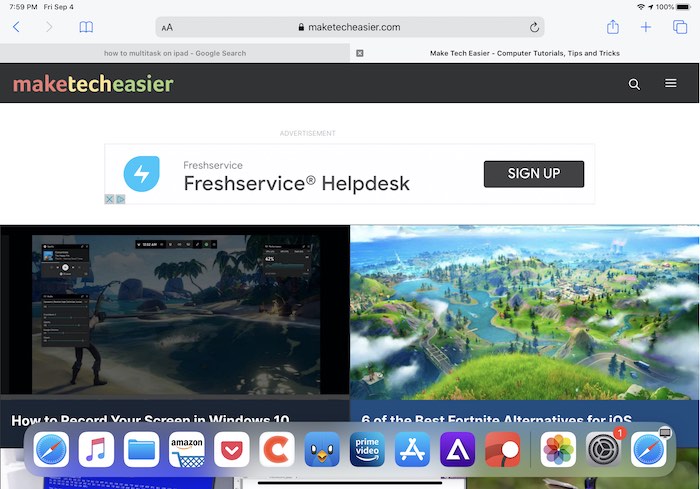
2. Touch and hold the second app you want to introduce in Split View and drag it from the deck to the left or right side of the screen. Drag it until it shows up in a split-screen on the left or right side of the screen. If the app is not in the dock, open it quickly so it appears in your recently-used apps on the right side of the dock.
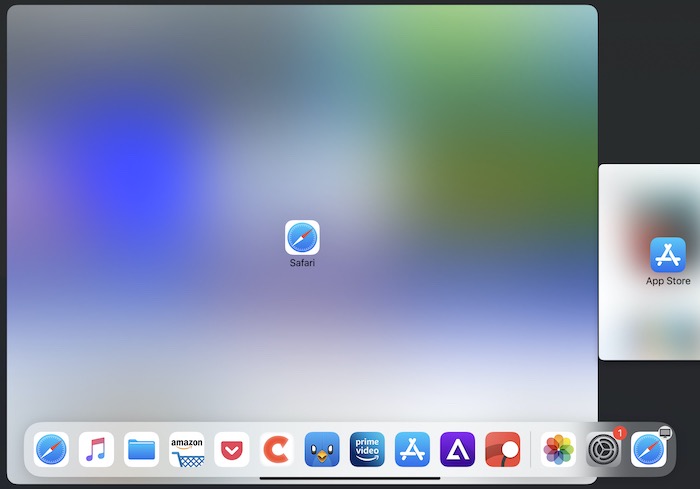
3. When the app is in Split View, the apps can be resized by dragging the app divider that sits in the center of the screen. For the most part, apps can be resized into thirds.
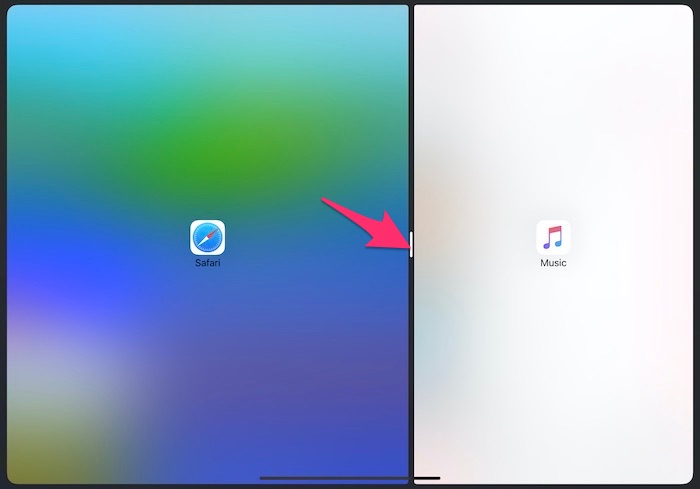
4. To close Split View, drag the app divider over to the edge of the screen on either the left or right until one app closes.
The biggest caveat with Split View is that not every app is built to use it. That decision is up to individual app developers, whether to incorporate it into their app(s). It’s an annoyance to be sure, but apps are updated every day to introduce this feature.
How to Use Slide Over
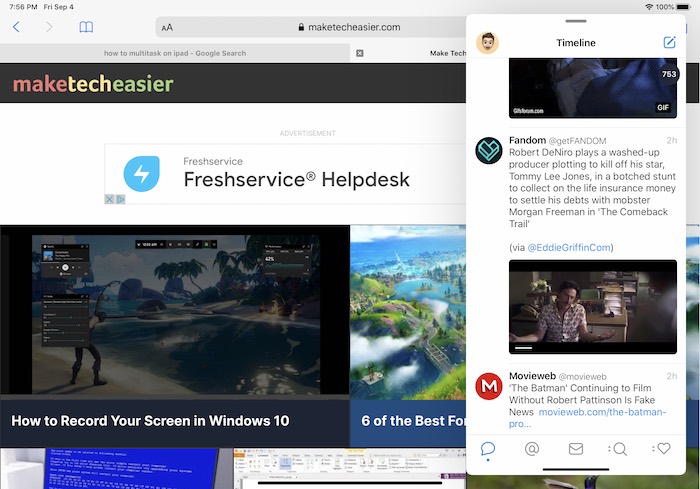
One of the easiest and quickest ways to get started with multitasking on the iPad is to learn to use “Slide Over.” Basically, Slide Over enables you to open an app that will “float” on the left or right side of the screen. It can potentially cover a key part of what you are browsing or reading but is also one of the fastest ways to start multitasking.
1. Start by making sure you have at least one app open. Now swipe up from the bottom of the screen to open your dock. If you attempt to do this too fast, you will end up on your home screen.
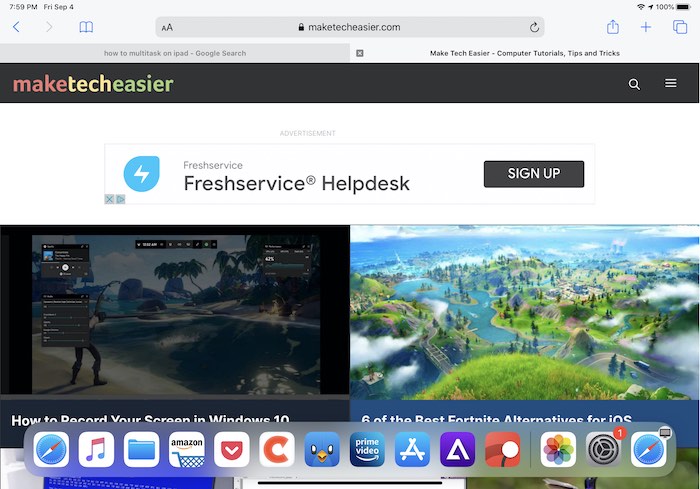
2. From your dock, find the app you want to use with Slide Over. Press and hold the app icon for a brief second and lightly pull it up toward the middle of your iPad display.
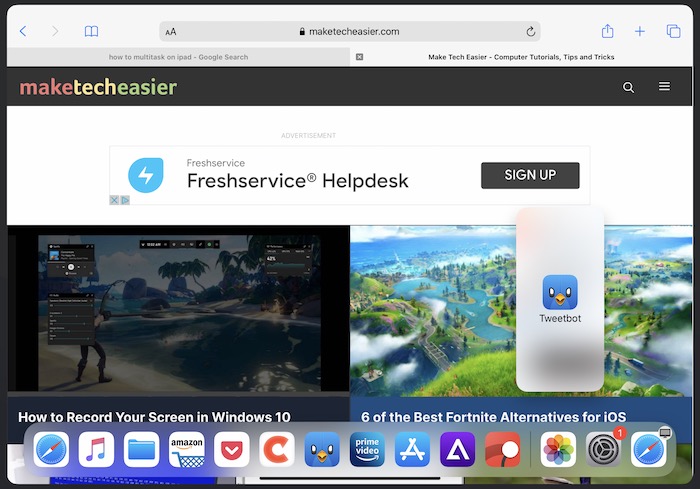
3. Note that if you pull the app too far right or left, it will activate split view.
Once the app is dragged out of the dock, it should immediately appear on screen. To move the window from side to side, there is a thin gray horizontal line at the top which will allow you to pull the window either to the left or right.
How to Open Three Apps at Once
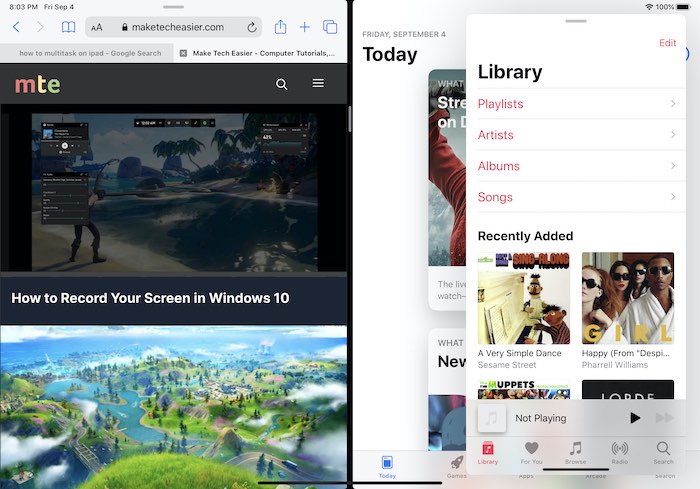
If you really want to get crazy with iPad multitasking, go ahead and display three apps at once. In this situation, you will combine both the Split View and Slide Over methods. To do this, open two apps in Split View using the method explained above, then follow the Slide Over method above and pull an app out of the dock onto one of the sides of the screen. You will now have two apps open in Split View while the third app is enabled with Slide Over. The third app can still be dragged from one side of the screen to another.
Want to have more than three apps open? You can. Do this by “stacking” apps in the Slide Over. More apps are allowed in Slide Over than just one. Put the additional apps into the Slide Over stack the same way you moved the initial app to Slide Over. If you slide the stack in and flick up slightly on the bottom of that stack, it will fan out the apps in Slide Over. Fan through them to choose the one you want by swiping left and right. Tap the one you want to select it. This makes it easy to work with multiple apps at the same time.
How to Open the Same App More than Once
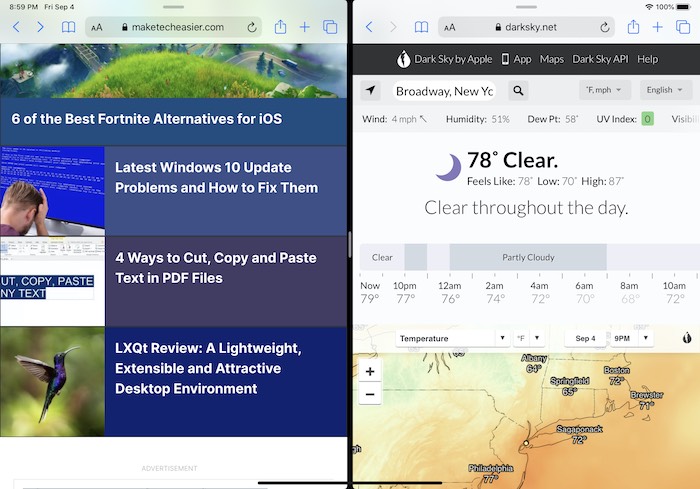
For iPad users on iPadOS 13.1 and later, you now have the option of opening three separate instances of the same app at one time. You can do this in Slide Over, Split View, or both, and works well with many of Apple’s default apps like Safari and Notes or Microsoft apps like Word.
To do this, open Safari in full screen and grab the Safari icon from the dock again and put it into Split View mode. Try and grab Safari from the dock again and drag it up as a third instance in Slide Over mode.
How to Use Drag-and-Drop
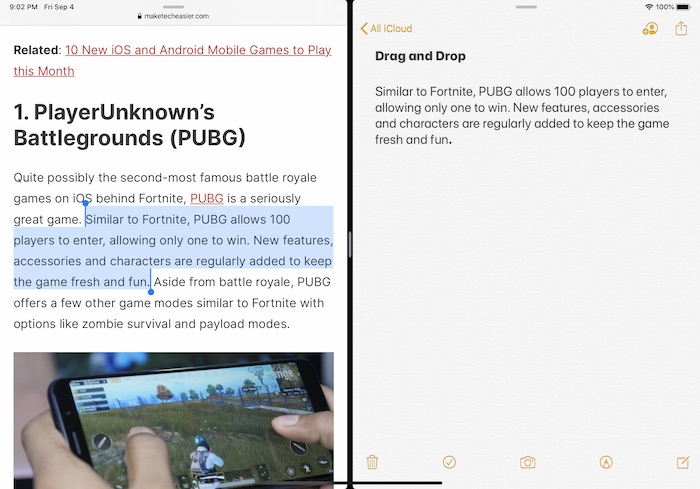
One of the best aspects of iPad multitasking is sharing information between two open apps. This works especially well in Split View. The ability to share text, image files, videos and other kinds of options makes iPad multitasking feel more computer-like. To move text between apps:
1. Open two apps side by side in Split View and highlight the selected text you would like to save.
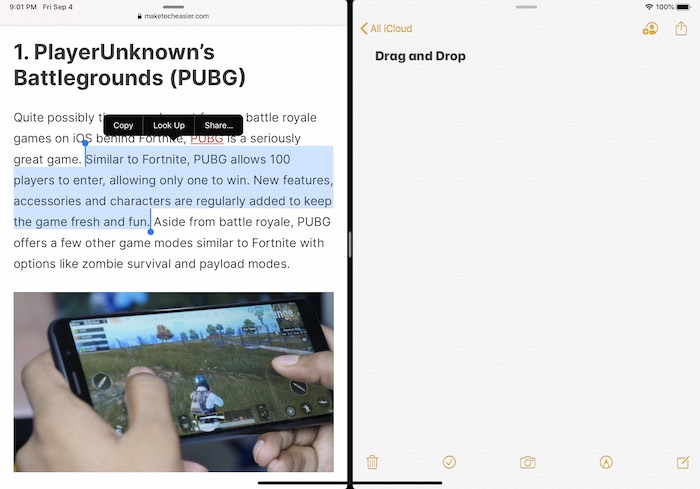
2. Hold your finger on the selected text and drag it over to the app on the other side.
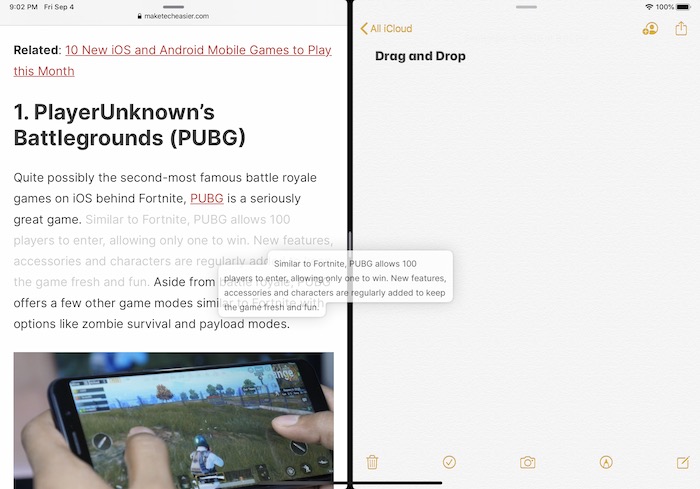
3. Release your finger, and the text should appear in the other app. This works best when dragging and dropping text into Pages, Word, Notes, etc.
How to Use Swipe Gestures
The available gestures are one of the most basic aspects of iPad multitasking. To quickly jump to another app or see the home screen, you can use any of the available gesture options:
- To see the app switcher, swipe up with one finger from the bottom of the screen and drag it up to the middle of the screen until the app switcher appears. You can then swipe left or right to find another open app.
- When you need to switch apps, swipe left or right on the screen with three or four fingers to switch to a previously-opened app. If you are using an iPad that has Face ID, swipe along the bottom edge of the screen to see previously-opened apps.
- If you want to quickly return to the home screen, swipe up from the bottom edge of the screen. Alternatively, you can pinch five fingers together, and that will automatically take you to the home screen.
For more productivity tips, see our lists of the best reminder apps and best gamification apps that you can get for your newly multitasking iPad.
